
this blog contains affiliate links
Guest Sewist: Kaitlyn
PDF Sewing Patterns being used for this Mash-Up:

Hey Rainsters!
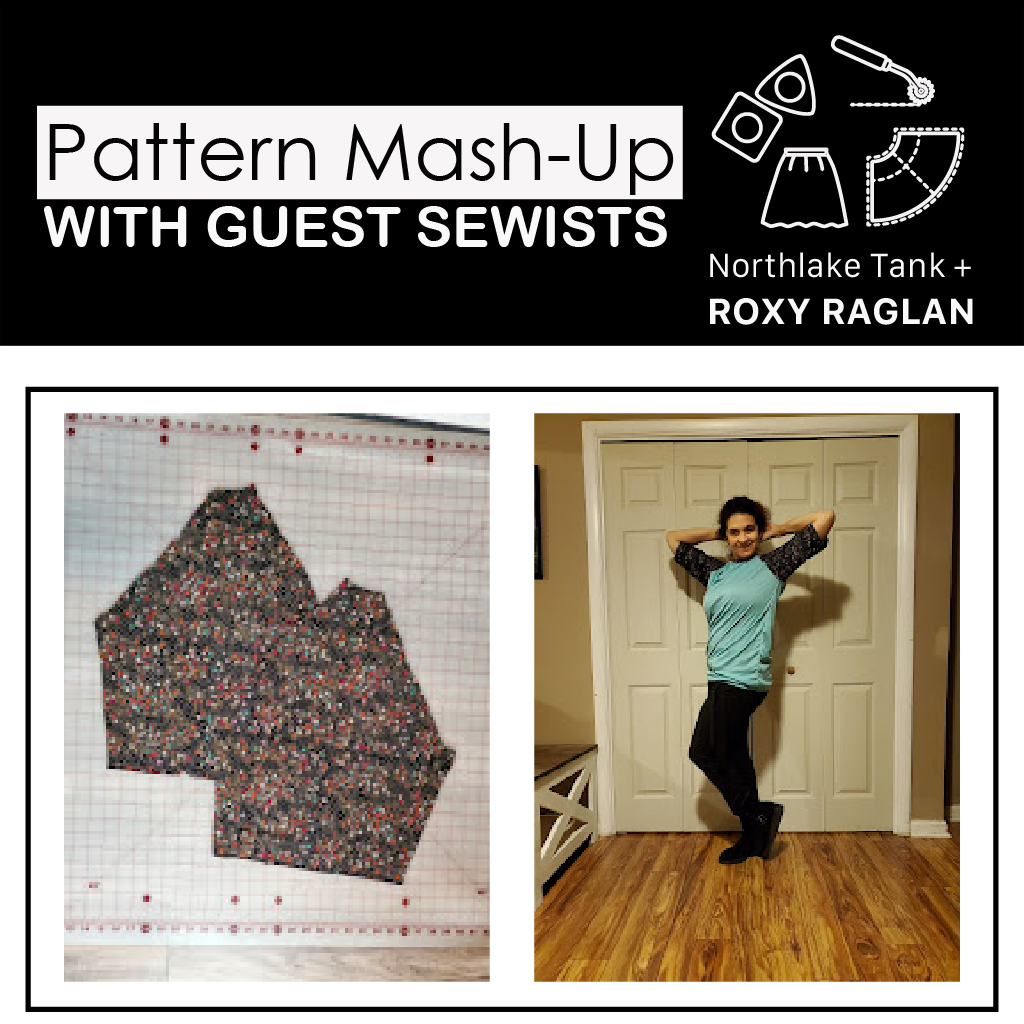
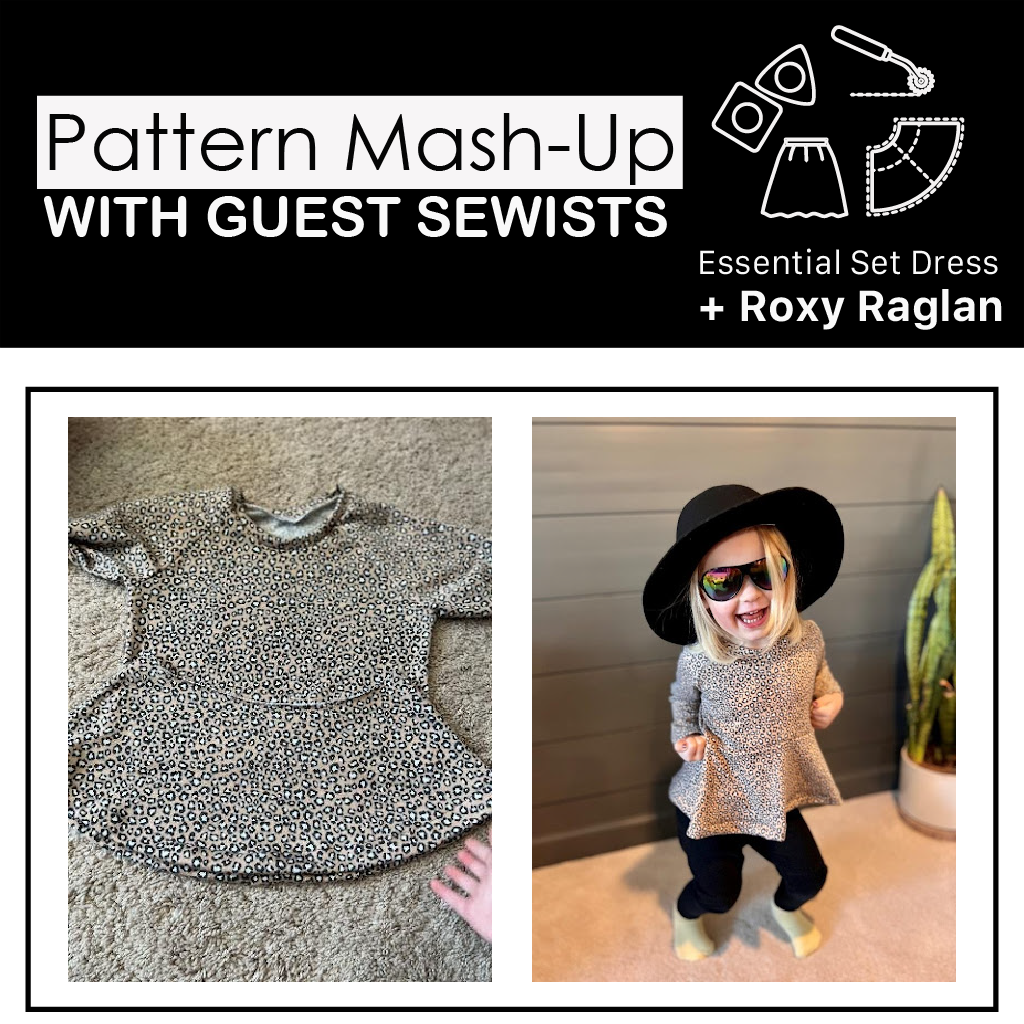
I’m Kaitlyn over at L.J.Makes on Instagram. That’s me, in the new Bodycon dress.
I’m a fairly new sewist who loves making items for myself and family. I’d say beginner/intermediate territory, with enough skills to be dangerous. What I love about Rain City Patterns, besides the amazing projector files, great designs, and thorough directions, is this community (Thanks, Blair!). It is amazing to learn from so many diverse and talented sewists how to create dream items and to celebrate the accomplishments!
Recently, I was at a playdate with my two-year-old and one of her little friends had on the cutest shirt. It was floral and French terry, perfect for the winter months, and it was a raglan sleeve peplum. When I went to google it, I realized that the raglan/peplum combo isn’t super common. Maybe that’s why it caught my eye in the first place. Regardless, I became set on recreating the masterpiece.
I started with the Essential Dress pattern first, choosing the ¼ circle skirt top option as my peplum choice. It lays flat, while giving a little flair. I cut two of those and measured the side seam of the top for future reference.

Next, I moved onto the Roxy Raglan. I cut the sleeves, neckband, and before I cut the front and back I noted where the side seam landed on the Essential. There was about an inch difference and so I shortened it to where the Essential landed. As the project continued, I shortened it even more, but we’ll get to that in a minute.
I sewed them up and well…the results weren’t quite what I had hoped. Still super cute, but it wasn’t as short as I was hoping for. I wanted it more shirt like. There was also a slight bunching where the top pieces were a bit too big for the peplum top skirt.
The kid may look crabby, but that was mostly because I wasn’t promising treats as a reward for the photos.

On a mission, I busted out that seam ripper and made some adjustments. Before she took it off, I noted where her natural waist sat and decided to move the skirt up to there.
Cutting off an extra 4” from the front and back pieces, helped give it more of a shirt instead of a dress look.
I also took in the sides about ½ inch. Starting at the arm hole I graded the sides with my serger.
Like I said, I have enough skills to be dangerous. It wasn’t very technical or professional, but it sure worked!
This was exactly what I was envisioning and I cannot wait to make more!

What risks do you take while sewing?